Graphical User Interface
- 4 minutes to read
- Print
- DarkLight
- PDF
Graphical User Interface
- 4 minutes to read
- Print
- DarkLight
- PDF
Article summary
Did you find this summary helpful?
Thank you for your feedback
Info
The senhasegura web interface can be securely accessed on your mobile device or workstation via HTTPS, using a compatible browser.
The upper right corner also shows the Username and a link to the user’s Home screen.
 User desktop screen
Some icons are found across the user interface:
 : Main Menu
 : Quick search
 : Home page
 : Quick actions
 : Emergency panel
 : Help. By clicking on this icon, you will see the following options:
menu grid here
Sidebar menu
You can access all the platform’s features using the menu on the left-hand side of the screen. The sidebar menu changes for each senhasegura module to reflect its unique features.
Click on the shield icon in the upper left corner to see the different Modules available.
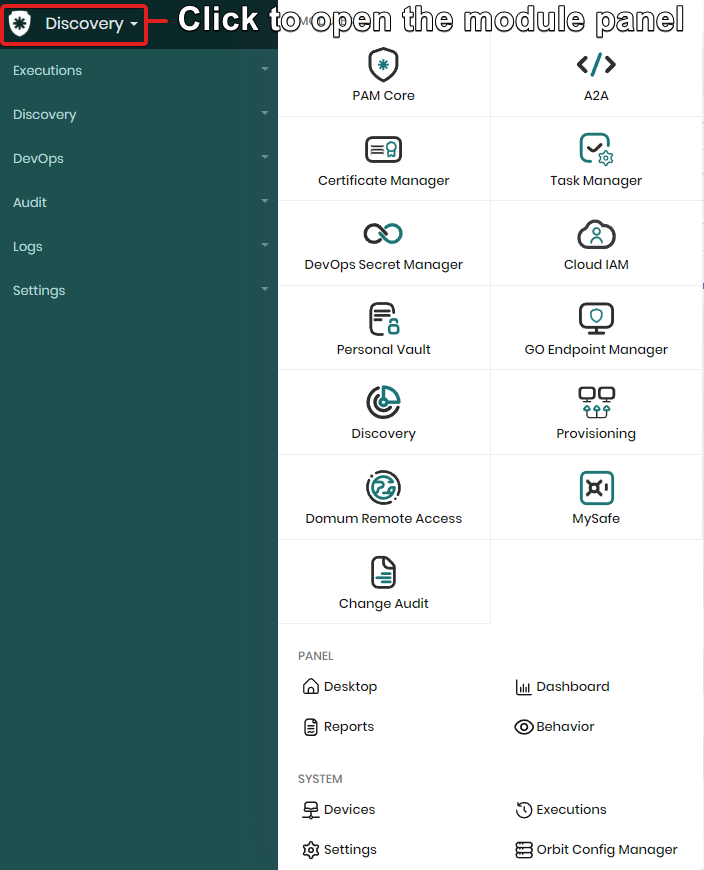
When you change modules, the sidebar menu will show a drop-down list with its different features. Features with a small arrow on the right-hand side have additional options that you can show or hide by clicking on the names.
You can learn more about each module and feature in their specific documentation. This article will focus on providing a general overview for beginners who are navigating senhasegura for the first time.
When you click an item on the menu, it will load the page of that feature. You can return to the Home page by clicking on the Home icon.
Quick search
You will find a search bar on the upper part of the screen where you make quick searches. The quick search field
 Quick actions
The Quick Actions icon opens a small menu that you can use to add new credentials and devices to senhasegura, among other options. Different users may see more or fewer options depending on their privilege level. You can learn more about each of these features in their specific documentation.
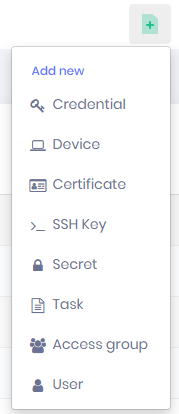 The quick actions menu
Report Screens
Most of senhasegura's report screens are very similar. Learning to navigate them helps you find information more quickly.
Report screens display a table or grid whose columns and rows bring information from the database. In most reports, you can filter these results to show only the information that is most relevant to you.
Here is a screenshot of a typical screen report:
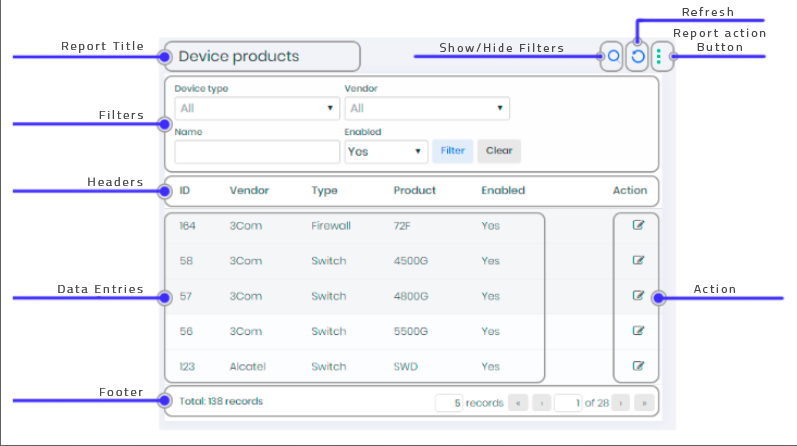 Report screen elements
From top to bottom:
- Report title: Name of the report. Hover the mouse on top of the title to see the report’s number.
- Filters: Use the drop-down lists to filter results. Only entries that match these conditions will be shown in the report below. Don't forget to press the Filter button to filter your search. Press Clear to remove all filters. You can also hide the filter bar by clicking the search icon (magnifying glass) in the upper right corner.
Note
You can make the filter bar visible in all reports by changing the settings in Settings ➔ System parameters ➔ System parameters. On the Application tab, look for the parameter Hide filters by default? and choose No.
- Header: Shows the different columns and their names. The last column to the right is often the Action column. Click on the header of a particular column to sort results. Click again to reverse the order.
- Data entries: All the entries from the database that are relevant to this report or filtered search.
- Report footer: shows the total of records found and allows the user to configure the number of registers per page and navigate by the pages;
- Footer: Shows the total number of entries in the report and gives users the option to choose how many entries they would like to see per page.
- Show/Hide Filters: Click on the search icon (magnifying glass) to either show or hide the filter options for this report.
- Refresh: Refreshes the report to show the most up-to-date data.
- Report action button:The three dots in the upper right corner open a list of actions associated with your report. Different reports have different actions associated with them. Most include:
- New: Creates a new entry;
- Update: Refreshes your report with the most up-to-date data from your database;
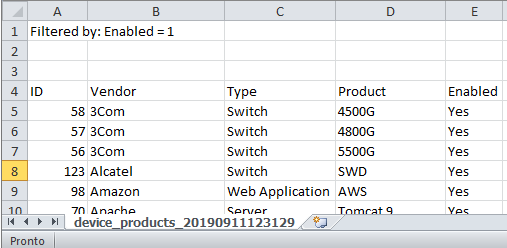
- Print: Generates a PDF file that you can store or print. senhasegura PDF files usually look like the example below:
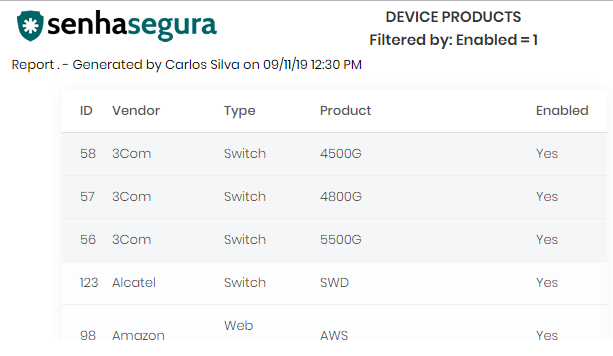 Report rendered for print
 - Export CSV: Export the data to a CSV file.
 Report rendered and downloaded as CSV file
 - Schedule report: schedule a date and time to send this report by email to the specified recipients.
- Action column: In some reports, the Action column shows the icon of a specific action. In this case, you can hover the mouse over the icon to read the name of the action. Click on the icon to perform the action.
- More Actions: When available, this button opens a list of different actions associated with a particular entry. These options may vary depending on the entry and the user's privilege. For example, if an entry has already been deactivated, this option will no longer be shown.


Was this article helpful?
