- 2 minutes to read
- Print
- DarkLight
- PDF
One Identity
- 2 minutes to read
- Print
- DarkLight
- PDF
The integration of senhasegura with the IGA One Identity Manager solution aims to centralize the control and release of accesses. Based on the concept of Identity Governance and Administration (IGA), it unifies privileged information, mitigating the risks related to the authorization of users to enter different environments with greater control of identity expansion and, consequently, strengthening the cybersecurity posture.
For this, it is necessary to configure the solution:
In senhasegura
You need to register a provider to perform the integration:
Go to Settings ➔ Authentication ➔ Identity Management (IGA) ➔ Providers
Click on the
⁝icon, select the option + New

Under Configuration, add the following information:
- Name
- active
- Protocol
- Description
- tag
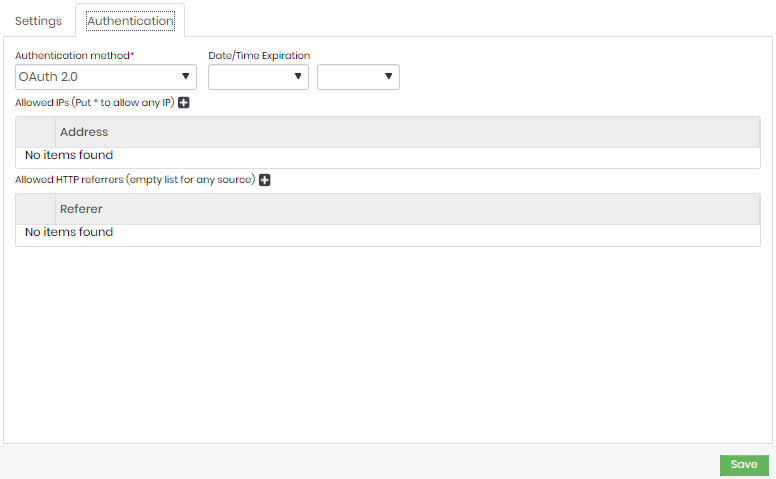
- Under Authentication, add the following information:

- authentication method
- Validity Date/Time
- Allowed IPs
- Referrals allowed
Prerequisites
Register a SCIM provider as described in the section Setting up a synchronization server from One Identity.
Set up a group sync as described in Setting up a synchronization server > Validar link
Installation
After finishing the configuration of the requisites, go through the process of installing and configuring the One Identity Manager Service:
- Launch the Server Installer program on the administrative workstation
- In Database connection, enter valid connection credentials for the One Identity Manager database
- In Server Properties, specify the server on which you want to install the One Identity Manager Service
- In Machine Functions, select SCIM
- In Server Roles, select the SCIM Connector
- In Service Settings, check the One Identity Manager Service configuration
- To configure remote installations, click Next
- Confirm the security prompt with Yes
- Select the directory with the installation files in Select Installation Source
- In Select private key file, select the file with the private key
- In Service Access, enter the service installation data
- Click Next to start installing the service
- Click Finish on the last page of the server installer
Cloud Sync
When installation is complete, create a project for initial synchronization of a cloud application.
- Start Launchpad and log into the One Identity Manager database. If you prefer, click Start New Sync
- Select the target system type SCIM Interface, and click Start.
This option will launch the Synchronization Editor project assistant - In System Access, specify how One Identity Manager can access the target system. Enable Connect using the remote connection server
- Select the server to be used for the connection in the Work Server option
- In Configuration data, enter the connection parameters required by the senhasegura SCIM connector to log in to the cloud application, as shown below:
- DNS name/URL of the servers with the senhasegura hostname.
Ex.:https://vault.senhasegura.com/ - URI service with iso/scim/v2
- Authentication endpoint or URL with the senhasegura authentication URL.
Ex:https://vault.senhasegura.com/iso/oauth2/token - Application/client ID with senhasegura client ID
- Client secret with senhasegura Client secret
- Lease type with customer credentials option
- Perform connection test in Check connection settings, by clicking on Test.
- In Display Name, enter a unique display name for the cloud app
- In Select Project Template, add a project template with SCIM sync option
- In Restrict access to target system, select the Read-only access to target system option
- In Sync Server, select the sync server to perform the sync
- To close the project assistant, click on Finish


