- 2 minutes to read
- Print
- DarkLight
- PDF
Shared Information
- 2 minutes to read
- Print
- DarkLight
- PDF
Overview
In the Settings ➔ Access groups menu, you can access the access groups configured report for personal information. You can even create new access groups.
On the Access limitation tab, it is possible to restrict the information access by dates, days of the week, and hours. In case a user that belongs to one of the access groups tries to access the information in date, day, or time out of the restrictions configured, it will get an error message indicating a restriction issue.
Unlike credential access groups, personal information access groups do not have a criteria tab. This means that only security policies and member users are configured.
The maintainer of the registered information has the power to decide on who that information will be shared for, not the access group administrator.
Note that by not having the criterion as an attribute of an access group, the name of the access group should reflect the security policies.
Registering a new Access Group
When clicking on the option to create a new access group, the Access group registration screen will open and there firstly, it's necessary to fill up the following fields and options:
- Access group name: name of the access group that matches the rules that this group applies. This makes easier understanding and auditing;
- Description: a brief description of the access group;
- Enabled: whether the group is active or not. Disabling a group can reduce the amount of information the user has access to or reduce the level of security required to access the information;
After filling up the initial fields and options, all other configuration options are separated by tabs:
- Settings:protected information settings
- User can view the protected information: flag if the user can see the protected information;
- It requires justification to view the protected information: flag whether it is necessary to register a justification to see the protected information;
- It requires approval to view the protected information: flag whether another user will need to act as an approver to see the protected information. Once active, you also need to set for how long this approval will be valid;
- Approvals required for viewing: number of approvals needed to approve the operation;
- Disapproval required to cancel: number of refusals to prevent operation;
- Approval in levels: flag if approvers will be triggered in levels. So you can set a hierarchy of approvers;
- Users:associate users to the access group that will have the role of operators.
- ID: ID of the user to be added or removed;
- Name: name of the user to be added or removed;
- Username: the username of the user to be added or removed;
- E-mail: the e-mail of the user to be added or removed;
- Approvers:associate users that will have the role of approvers of the operations regarding the use of the information.
- ID: ID of approver to be added or removed;
- Name: name of the approver to be added or removed;
- Username: the username of the approver to be added or removed;
- E-mail: the e-mail of the approver to be added or removed;
- Access limitation: you can restrict the group's access to the protected information by days of the week, time of the day, and period (start and end date).
Registering Shared Information
Like personal information, shared information has the same protected attributes and expiration information.
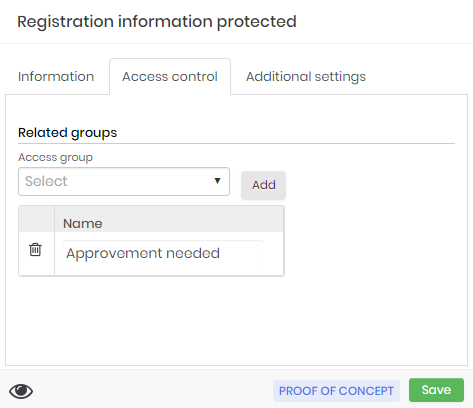
Its difference lies in the fact that the information holder configures which access groups will have access to information without knowing the participants of these groups.
 Shared Information Form
Once the information is registered, the secret holder can view the information and observe which users have access to the secret.

